Showing posts with label machine embroidery. Show all posts

Monday, March 28, 2011

New year new course

ex 2 Filling in with straight stitch

I have undertaken to do a Creative Machine Embroidery course for 2011. Once again this course is through SWTAFE Warrnambool with Karen Richards being our teacher. The course is available on campus and off campus and I have the opportunity to do a bit of both, so I don’t have to freak out if I don’t get to classes. Just hope the self discipline part of off campus studies doesn’t do me in. The above image is a sampler that was required – FILLING IN WITH STRAIGHT STITCH.

Our weaving group was hoping to continue this year but due to TAFE restructuring their fee schedules, this became way too expensive for some. I am still hoping to weave in some way or other this year.

Monday, December 15, 2008

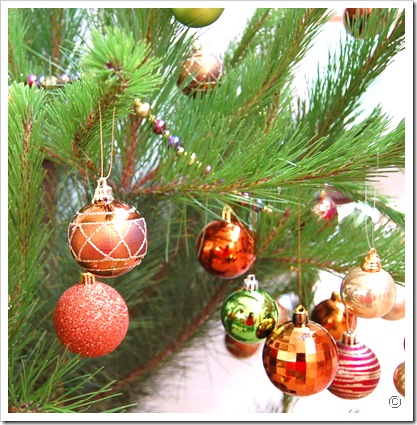
As the tree droops, my balls fall off…

pic 011a

I smothered my tree in balls this year but they fall off intermittently, either via the drooping branches or inquisitive grandchildren. Hey, I can see myself in some of the balls.

pic 157

Actually spent some time ‘making’ today, instead of obsessively admiring everyone else’s work on their blogs. Oh, I did manage to do that too. I made this envelope from card I salvaged from the ever present packaging of objects. I printed an envelope template from How About Orange onto it and then printed the pear design from LollyChops onto it.

I am continually gobsmacked about the wonders of technology and what it allows you to do. I have been a computer nerd for an inordinately long time. My first computer (I’ve lost count of the number of computers I have been through) was a very small monochrome monitor with text (orange in colour) only – no graphics at all, with 20mb of hard disk space which was ample. All commands had to be typed in. When word processing, for example, if you wanted a font to be bold, a code had to be typed into the document. If I wanted to print the document I had to type the appropriate command into the operating system, which happened to be DOS. I was fascinated then and I still am.

New discovery for me, something I should probably have known decades ago – the back of the stanley knife blade is a great scorer for placing folds in cardstock. Why didn’

pic 161

I continued ‘making’ and am hoping to make some bunting to hang around, mainly to make things look festive for the grandchildren. So far I have done three flags with the one design. And, yes, I probably have no hope of getting these finished before Christmas. They’ll be ready for next Christmas.

Thursday, November 27, 2008

Felting Lilies

Still cramming everything in at the last hour. As part of the Experimental Textiles course I am doing with SW TAFE, a sample depicting CONTAIN had to be completed. The night before doing this, I was flicking through a magazine when I saw this photo of lilies - I have a bit of an obsession with this shaped lily in my art work.

It gave me the idea to do some felting CONTAINING this lily image, well, an approximation of it anyway.
So... I chose three of the lilies for their shape and placed a mix of orange and yellow wool over a layer of greens. It's not quite as simple as it sounds. I did put a bit of groundwork into it.


Now time for lots of elbow grease in the form of soapy water and agitation to get those fibres to hook onto each other. I must have done a good job because it shrunk so much more than I expected- more length wise than width wise so my lilies are fat. Before felting, it was very close to the same size as the bubble wrap. Felting is definitely not an exact science.

Next step - machine embroidery - another new skill I am just getting to know.

Yep, the leaves look a bit odd, but it is EXPERIMENTAL textiles and I am having so much fun experimenting.

Following is what I had hoped to be their shape, thanks to a bit of elongation in Photoshop.

And here is another piece I added to my samples folder for the CONTAIN subject, which is basically drawing pictures with the sewing machine. I hope I've got enough life left for all the ideas I have swimming around in my head.


Monday, November 24, 2008

Machine Embroidery with Soluble Stabiliser

Another exercise for Experimental Textiles with South West TAFE - the course that has now finished for the year. As usual, I'm still finishing off required tasks.

As part of the CONTAIN subject, I have used soluble stabiliser, and it was VERY experimental. I couldn't find directions for it's use, so I really had to experiment. Firstly, I laid out silk fibre on top of the stabiliser to depict a simple composition of three flowers. I obtained this beautiful fibre from spiraldyed.com and a little goes a long way.

I then folded the other half of the stabiliser over the top. Off to the sewing machine and this is when the problem solving had to be called upon. Through trial and error I worked out to lower the feed dog, use a ballpoint needle to help stop snags, change the foot to a darning foot (this made the most difference) and have stitch size at zero. I'm sure there are many other things I should know about this process. All advice welcome.

This is the result after sewing.


Then into a sink of warm water and a bit of agitation to get rid of the gloop.


Onto the line to dry.

And after an iron, this is the final result. It has resulted in a delicate fabric which I like. Actually I really like how it has turned out. The image doesn't do it justice. I made lots of mistakes throughout the process but I learnt a bit too. The next one will be better.


And the last image is from a bunch of flowers I received from grandchildren no. 1 and 3. They made a request to their other grandmother for flowers from her garden. I got a bunch of roses as well. I'm not au fait with flowers so I'm not sure what species they are.